Our KeyLock® Air Seal Corner system prevents air infiltration through dovetail corners, eliminating the need to continually caulk or chink your home.
INSTALLING A KEYLOCK® AIR SEAL CORNER
STEP 1
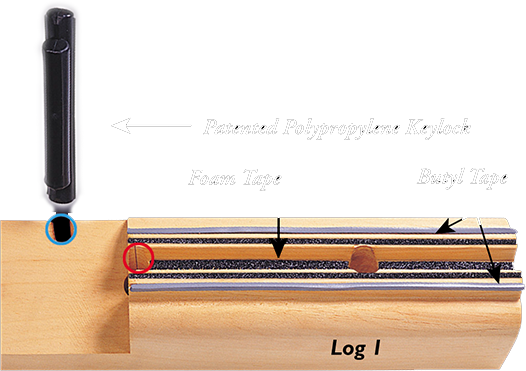
Log 1 is sawed in half at the factory and attached to the concrete foundation or sub floor. Two rows of butyl tape and four rows of foam tape are applied to the top of log 1 in the patented tongue and groove channels.
We pre-drill a 1-1/8” hole in the centre of the log as shown in red. A second hole is drilled on the inside face of the log, shown in blue. When the dovetail is cut, part of the hole, shown in red, is removed.
STEP 2
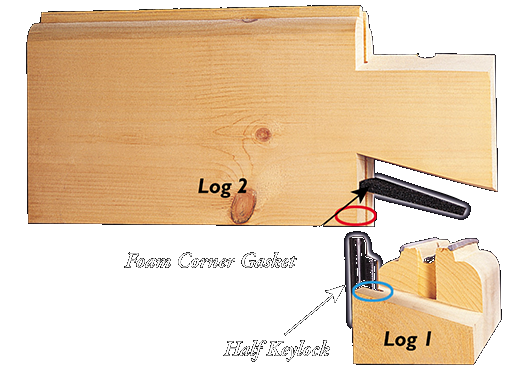
The bottom groove of log 2 is removed at the factory to lay flat on the concrete foundation or sub floor. The patented polypropylene KeyLock® is cut in half. The top half of the KeyLock® is driven into the inside face of log 1, shown in blue. A foam corner gasket is applied to the top of the dovetail on log 1 to seal the angled surfaces between the dovetails of log 1 and log 2. The red hole in log 2 drops over the half KeyKock® in log 1. The inside face of log 1 is now KeyKocked® to log 2, creating an air tight seal.
STEP 3
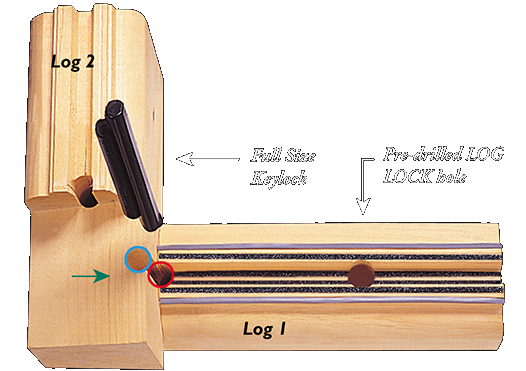
Log 1 is sawed in half at the factory and attached to the concrete foundation or sub floor. Two rows of butyl tape and four rows of foam tape are applied to the top of log 1 in the tongue and groove channels.
When the faces of logs 1 and 2 are brought together, the blue and red holes create a figure-eight shape. A full size KeyLock® is driven into the inside face of log 2 (blue), which tightens the inside face to the side of log 1 (green arrow).
STEP 4
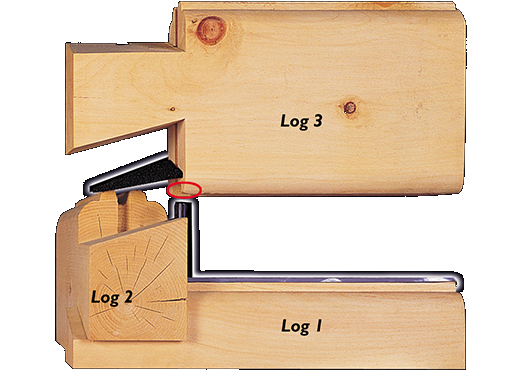
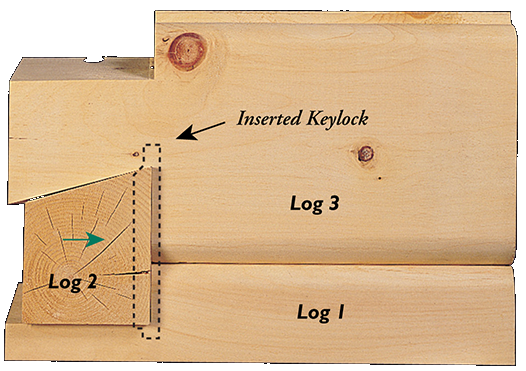
Another foam corner gasket is applied to the top of the dovetail on log 2. The red hole in log 3 is dropped over the KeyLock® in log 2.
STEP 5
Logs 1, 2 and 3 are now KeyLocked® together at the interface. The green arrow shows the direction in which log 2 is tightened. Log 2 will shrink to logs 1 and 3 create an even tighter seal over time.
STEP 6
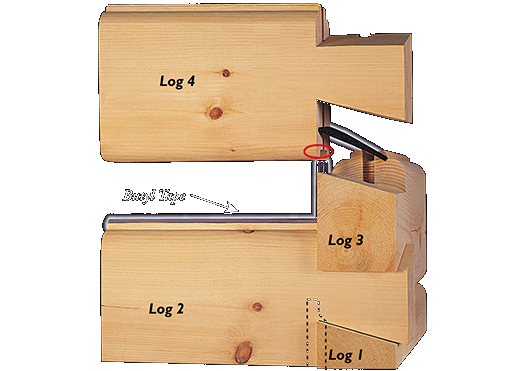
On top of log 2, butyl and foam tape again set into the tongue-and-groove channels. Another KeyLock® is driven into the inside face of log 3, which tightens this face to the side of log 2. A third corner gasket is applied to the top of the dovetail on log 3. The red hole in log 4 is dropped over the KeyLock® in log 3.
STEP 7
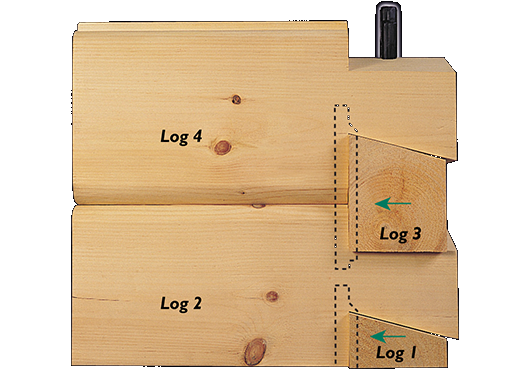
Logs 2, 3 and 4 are now KeyLocked® together at the interfaces. The green arrows show the direction in which logs 1 and 3 are tightened to logs 2 and 4 internally by the KeyLocks®. Log 1 and 3 will shrink to logs 2 and 4 over time to create an air tight seal.
Nails, lag screws or thru-bolts create a gap between the corners over time from shrinkage.
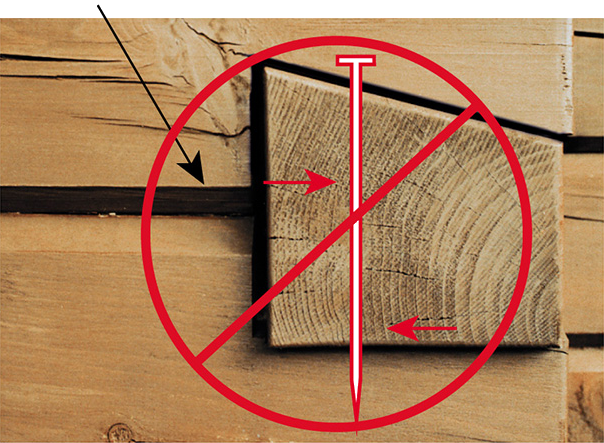
Logs will shrink toward the nail (red arrows).
THE PROBLEM
Corners will eventually begin to loosen due to natural shrinkage of wood.
TRADITIONAL SOLUTION:
Traditionally, the use of nails, lag screws, or thru-bolts in the corner cause the corner to separate due to log shrinkage, allowing air into the home.
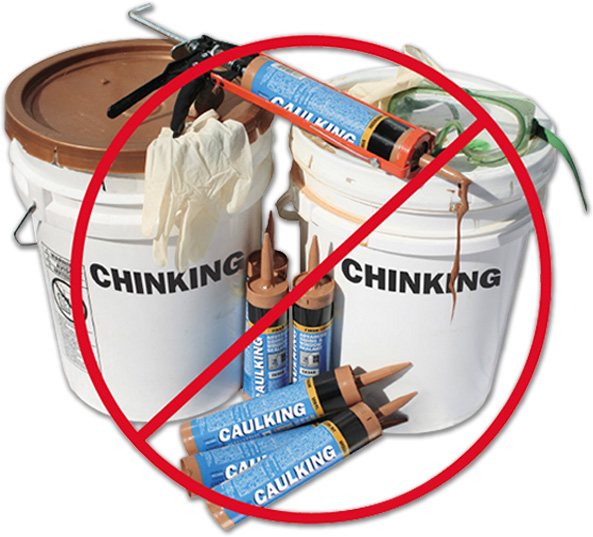
With this method, the log homeowner is required to fill the gaps around the corners with expensive and labor-intensive caulking or chinking products on a continuous basis.
OUR SOLUTION:
Our KeyLock® Air Seal Corner system prevents air infiltration through the corners, sparing log homeowners the messy and time-consuming task of caulking or chinking.
OUR SECRET:
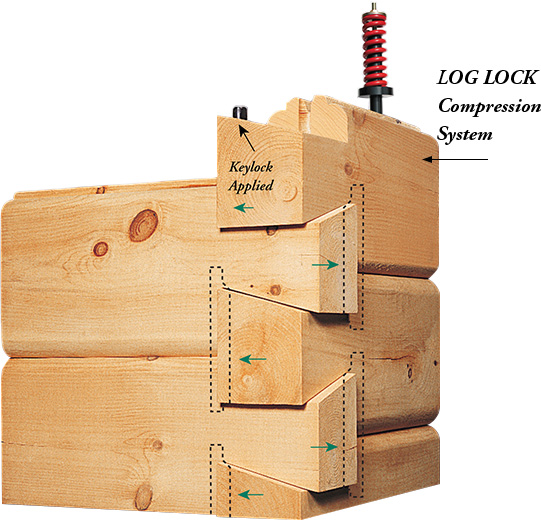
True North’s patented Keylock Air Seal Corner® virtually eliminates air infiltration into our log homes.
We use the naturally occurring log shrinkage our fullest advantage, making the corner tighter (as shown with green arrows below). Our KeyLock® tightens the log faces together and over time the log shrinks towards the KeyLock®—ensuring an air tight seal.
